Drone Photography Tips: Capture Amazing Aerial Photos
There’s something incredible about seeing the world from above. Whether it’s a golden coastline, a winding road through the mountains, or a city skyline at sunset, drones let you capture amazing aerial photos that were once only possible from a helicopter.
But getting those jaw-dropping shots takes more than just sending your drone into the sky and pressing a button. You need the right camera settings, good composition, and solid flying skills to make sure your shots are sharp, well-lit, and visually interesting.
This guide is packed with drone photography tips for beginners to help you get started. From pre-flight checks to editing your final images, you’ll learn how to take better photos, avoid common mistakes, and fly safely while getting the best possible results.
Pre-Flight Preparation: Setting Yourself Up for Success
Flying a drone isn’t just about hitting the power button and taking off. A little preparation goes a long way in making sure your shots turn out great and your flights stay safe. Put it all together and you’ll be taking Amazing Aerial Photos in no time!
1. Check the UAV Forecast and Local Regulations
Before heading out, take a few minutes to check:
- Weather conditions – Wind speeds over 15 mph? Probably not the best time to fly.
- GPS satellite availability – More satellites mean better positioning and stability.
- Airspace restrictions – Use apps like B4UFLY (US) or Drone Assist (UK) to check no-fly zones.
- Battery life – Always take off with a full charge and pack extra batteries.
2. Master Basic Drone Controls and Safety Procedures
If you’re new to drones, spend some time getting comfortable with the controls before worrying about photography and being able to take amazing aerial photos. Start with:
- Takeoff and landing – Smooth takeoffs and landings reduce the chance of crashes.
- Hovering practice – Staying steady in one spot is key for sharp photos.
- Return-to-home (RTH) feature – Test it out so you know what to expect in case of signal loss.
3. Photography Fundamentals Still Apply
Drone photography isn’t all about flying—it’s still photography. Keep these basics in mind:
- ISO, shutter speed, and aperture still affect exposure and sharpness.
- The rule of thirds helps frame shots in a way that’s naturally appealing.
- Golden hour (sunrise and sunset) provides softer light and more dramatic colors.
Camera Settings and Techniques: Capturing the Perfect Shot and Producing Some Amazing Aerial Photos
Even with an expensive drone, bad camera settings can ruin a shot. The good news? A few adjustments can make a big difference.
1. Shoot in RAW for Better Editing Flexibility
JPEGs are fine for quick sharing, but RAW format keeps more detail, giving you way more control in post-processing. If you want to adjust exposure, colors, or shadows later, RAW is the way to go.
2. Use the Rule of Thirds Grid for Better Composition
Most drone cameras have an overlay grid option. Turning this on helps you position key elements at the intersections of the grid lines, creating a more balanced and interesting shot.
3. Experiment with Aspect Ratios
Different projects call for different framing:
- 16:9 – Best for videos and cinematic-style photos.
- 4:3 – Keeps more detail, great for editing and cropping later.
- 1:1 – Perfect for Instagram or social media.
Try a few and see what works best for your subject.
4. Use ND and Polarizing Filters to Improve Image Quality
A bright sky can make drone shots overexposed. Neutral Density (ND) filters help control light, just like sunglasses for your lens. Polarizing filters cut down glare from water, glass, or wet surfaces.
- ND4 – Best for early morning or late afternoon.
- ND8 or ND16 – Great for sunny days.
- ND32+ – Needed for really bright conditions, like beaches or deserts.
5. Adjust Camera Angles for Unique Perspectives
Don’t just shoot straight down—there’s more to being able to take amazing aerial photos. Experiment with angles:
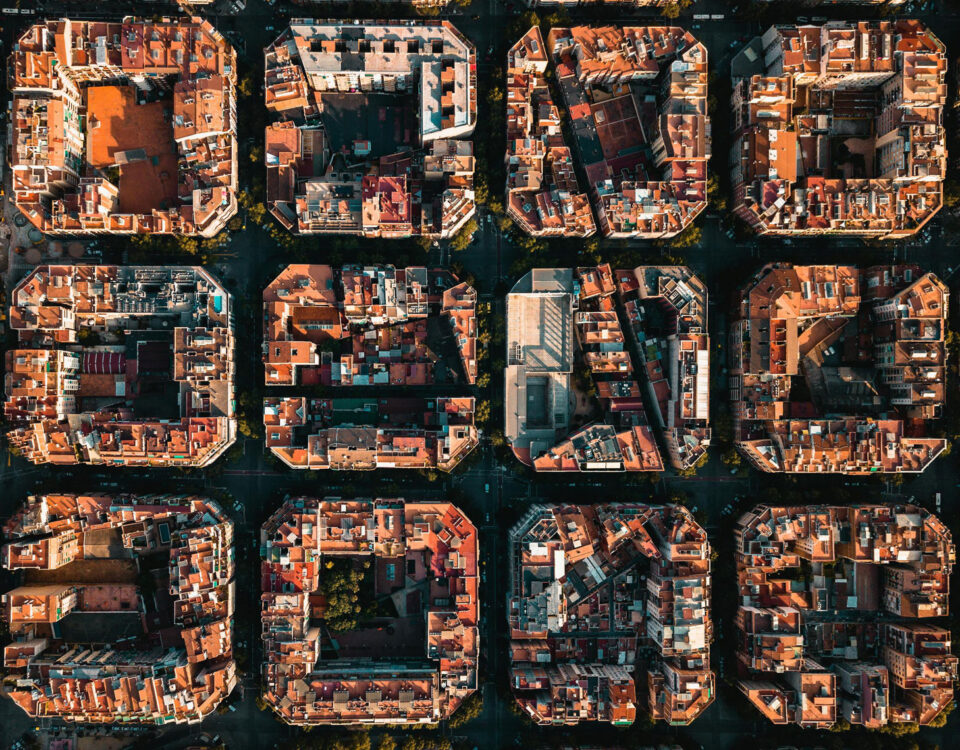
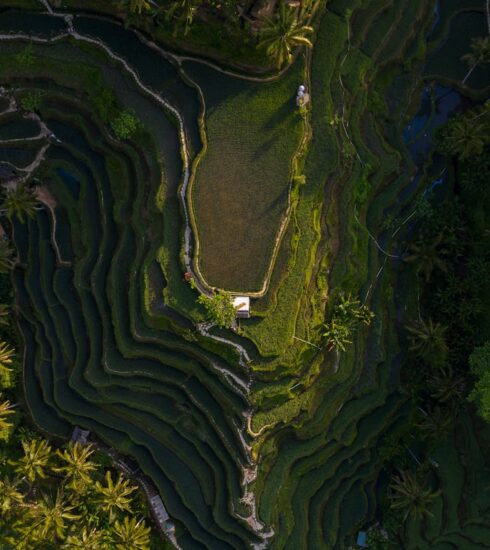
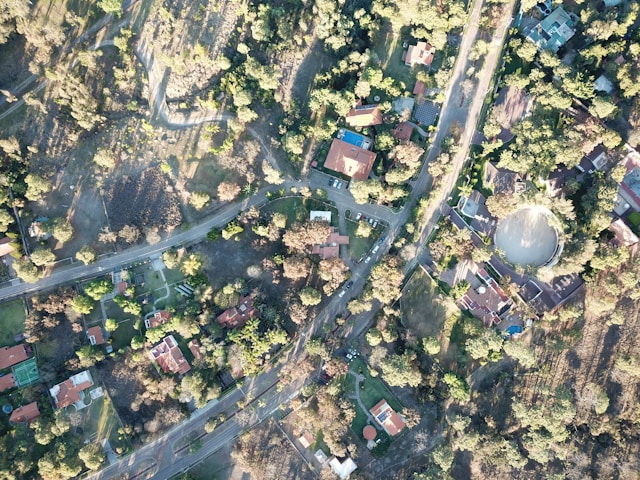
- Top-down (bird’s eye view) – Great for landscapes and cityscapes.
- Low-angle shots – Tilting the camera up can make buildings or mountains look massive.
- Leading lines – Roads, rivers, and coastlines create natural paths for the eye to follow.
6. Use Auto Exposure Bracketing (AEB) for Better Dynamic Range
Lighting can change fast, especially outdoors. AEB mode takes multiple shots at different exposures so you can combine them later for an HDR-style image. This is especially helpful when dealing with bright skies and dark shadows in the same shot.
Composition and Creativity: Elevate Your Aerial Photography
A drone gives you the ability to see the world in ways that most people never do. But just because you’re shooting from above doesn’t automatically make a photo interesting. Composition is everything.
1. Look for Symmetry, Patterns, and Leading Lines
Some of the best drone shots highlight things that aren’t obvious from the ground. Keep an eye out for:
- Roads and rivers that naturally guide the viewer’s eye.
- Geometric patterns in fields, buildings, or city layouts.
- Natural symmetry in landscapes, like reflections in water.
These elements can turn a basic shot into something way more engaging.
2. Capture High-Resolution Panoramas
A single drone shot is great, but sometimes you need more. Many drones let you stitch multiple images together for ultra-high-resolution panoramas. This works well for:
- Vast landscapes where a single frame won’t do justice.
- City skylines where you want to capture the full scale.
- Dramatic clouds or sunsets that stretch across the sky.
3. Experiment with Different Perspectives
Most people shoot straight down or at eye level. Try switching it up with:
- Top-down views – Great for abstract, artistic shots.
- Low-angle or side shots – Makes landscapes feel more immersive.
- Dynamic motion – Orbiting or following moving subjects can add energy.
4. Play with Light and Shadows
Lighting makes or breaks a photo. Aerial shots look best when the sun is low in the sky, which creates:
- Soft, golden light that adds warmth.
- Long shadows that give depth and drama.
- Less harsh contrast compared to midday light.
For the best results, plan flights around sunrise or sunset whenever possible.
Safety and Legal Considerations: Fly Responsibly
Flying a drone isn’t just about amazing aerial photos—you also have to think about safety and the law. Ignoring regulations can get your drone confiscated, or worse, lead to fines.
1. Always Keep Your Drone in Sight
- Legally, most countries require you to maintain a visual line of sight (VLOS) at all times.
- Even if your drone has return-to-home (RTH) or obstacle avoidance, losing sight of it increases the chance of crashes.
- If you’re flying long distances, have a spotter to help track it.
2. Know the Altitude and Distance Limits
- Many areas have a 400-ft altitude limit (about 120 meters). Going higher could interfere with manned aircraft.
- Avoid flying near airports, highways, and densely populated areas unless you have permission.
3. Watch the Weather and Battery Life
Drones handle wind differently, but as a general rule:
- Wind speeds over 15 mph? Consider waiting for calmer conditions.
- Cold weather drains batteries faster, so plan shorter flights in winter.
- Watch for rain, fog, and moisture, which can damage electronics.
4. Follow Local and International Drone Laws
Different countries have different rules, so always check before flying. Some basics:
- Register your drone if required (like with the FAA in the U.S.).
- Get a license for commercial work (FAA Part 107 in the U.S.).
- No-fly zones exist around national parks, military bases, and government buildings.
5. Be Respectful of People’s Privacy
- Avoid flying over private property without permission.
- Don’t record people who expect privacy (like in backyards).
- If someone asks about your drone, be polite and explain what you’re doing.
Playing by the rules keeps drone photography fun and hassle-free.
Choosing the Right Equipment: Best Drones and Accessories for Beginners
Not all drones are built the same. Some are perfect for learning, while others offer high-end features for serious photography. If you’re just getting started, picking the right drone can make all the difference.
1. Start with a Beginner-Friendly Drone
If you’re new to flying, it’s smart to start with a drone that’s:
- Easy to control – Look for features like GPS-assisted flight and beginner mode.
- Stable in the air – A 3-axis gimbal helps keep your shots steady.
- Affordable – Crashes happen, so avoid breaking the bank on your first drone.
Recommended beginner drones:
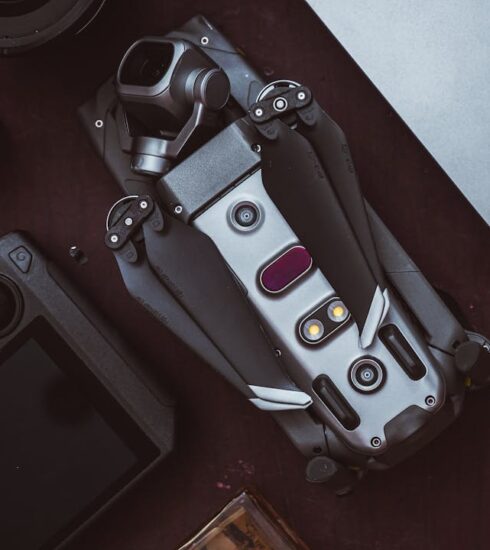
- DJI Mini 3 Pro – Compact, lightweight, and packed with smart features.
- DJI Air 2S – Larger sensor for better image quality, still beginner-friendly.
- Autel EVO Nano+ – A solid alternative with strong camera specs.
2. Invest in a Drone with a Gimbal for Stability
A gimbal is a mechanical stabilizer that keeps the camera steady. Without it, your footage will be shaky and your photos blurry. Drones with built-in 3-axis gimbals offer smoother, professional-quality shots.
3. Portability Matters: Best Drones for Travel Photography
If you plan on taking your drone on trips, size and weight matter. Foldable drones, like the DJI Mini series, are perfect for travel since they fit in a small bag and don’t require FAA registration if under 250g.
4. Must-Have Accessories for Better Drone Photography
A few extras can make flying easier and improve your photos:
- Extra batteries – Most drones get 20-30 minutes of flight time, so having spares is a must.
- High-speed microSD cards – Look for U3 or V30-rated cards for smooth 4K video.
- ND and polarizing filters – Help balance exposure and cut down glare.
- Landing pad – Protects your drone from dust, dirt, and debris.
Choosing the right gear makes a huge difference in the quality of your shots and how much you enjoy flying.
Post-Processing and Editing: Enhancing Your Drone Photos
Even with perfect lighting and camera settings, most drone shots benefit from a little editing. Small tweaks can turn a good photo into something truly impressive.
1. Best Editing Software for Drone Photography
You don’t need a full-blown studio setup to edit drone photos. These tools make it easy:
- Adobe Lightroom – Great for adjusting colors, contrast, and exposure.
- Adobe Photoshop – Best for removing unwanted objects or making fine adjustments.
- Skylum Luminar – A simpler, AI-powered editing option for quick enhancements.
2. Adjust Exposure, Contrast, and Colors
Drone photos often need slight corrections to balance highlights and shadows. Here’s what to adjust:
- Increase contrast – Helps define edges and make the image pop.
- Adjust shadows and highlights – Recovers lost details in bright or dark areas.
- Tweak white balance – Ensures colors look natural, especially in sunset shots.
3. Correct Lens Distortion and Enhance Details
Most drone cameras use wide-angle lenses, which can create slight distortion at the edges. To fix this:
- Use the lens correction tool in Lightroom or Photoshop.
- Apply slight sharpness and clarity adjustments to bring out textures.
4. Merge Bracketed Shots for HDR Images
If you used Auto Exposure Bracketing (AEB) while shooting, merge those images to create an HDR photo. This technique helps bring out details in both bright skies and dark landscapes.
Editing doesn’t have to be complicated. A few small changes can dramatically improve your final images.
Final Tips and Best Practices for Beginner Drone Photographers
Mastering drone photography takes time, but a few simple habits can help you improve faster and get better results.
1. Practice in Open Spaces Before Advanced Shoots
- Find a wide, open area with minimal obstacles.
- Practice smooth takeoffs, landings, and hovering before attempting complex shots.
- Get comfortable using manual controls instead of relying on automated flight modes.
2. Learn to Use Manual Mode for Better Image Control
Auto mode works fine, but manual settings give you more control:
- Lower ISO to avoid grainy images.
- Adjust shutter speed for sharp stills or motion blur effects.
- Manually set white balance to keep colors accurate in different lighting conditions.
3. Experiment with Different Styles of Drone Photography
Try out different approaches to find what you enjoy most:
- Landscape photography – Wide, sweeping views of nature.
- Urban photography – City skylines, traffic patterns, and rooftops.
- Action shots – Follow moving subjects like boats, cars, or bikers.
4. Always Review Your Shots Before Landing
- Check for overexposed areas or motion blur while you’re still in the air.
- If something looks off, adjust and reshoot before your battery runs out.
- Reviewing shots on location saves time compared to fixing mistakes in editing.
5. Stay Updated on Drone Technology and Laws
Drone tech evolves fast. Keeping up with firmware updates, new regulations, and emerging features can improve your experience and help you avoid legal trouble.
Take Your Drone Photography to the Next Level
The best way to improve is to keep flying, keep experimenting, and keep learning. The more you practice, the better your shots will get.
Whether you’re capturing landscapes, cityscapes, or action shots, following these drone photography tips for beginners to take amazing aerial photos will help you take stunning aerial photos while flying safely and legally.
Now, grab your drone and start exploring!
FAQ: Drone Photography Tips for Beginners
1. What is the best beginner drone for photography?
For new drone photographers, DJI Mini 3 Pro and DJI Air 2S are excellent options. They offer easy controls, high-quality cameras, and smart flight modes without being overwhelming.
2. Do I need to register my drone before flying?
It depends on your location. In the U.S., drones over 250g must be registered with the FAA. Check your country’s drone laws to stay compliant.
3. How do I get sharper drone photos?
- Shoot in RAW format for better editing flexibility.
- Use a gimbal-stabilized drone to reduce blur.
- Fly in low wind conditions to minimize vibrations.
- Use ND filters to control light exposure.
4. What’s the best time of day to take drone photos?
Golden hour (just after sunrise or before sunset) provides the best natural light, with softer shadows and warmer tones. Avoid midday flights when the sun creates harsh lighting.
5. Can I fly my drone in national parks or cities?
In many places, flying drones in national parks and urban areas is restricted without special permits. Always check local regulations and use apps like B4UFLY or Drone Assist to confirm where you can fly.
